What Size Is My Image and How to Optimize Dimensions
Learn how to check your image dimensions, understand DPI/PPI, and optimize sizes for web, print, and social media to improve quality and speed.

Introduction: Why Knowing Your Image Size Matters for Optimization
When working with digital media, knowing your image size is essential for achieving sharp visuals and optimal performance. Whether designing for the web, preparing graphics for print, or posting on social media, correct dimensions improve appearance and prevent slow loading times. Oversized files can hurt website speed — impacting SEO — while undersized images risk appearing pixelated or distorted.
Image dimensions play a critical role in:
- Web design: Faster load times, accurate aspect ratios, responsive layouts.
- Print projects: Preventing blurry, stretched, or low-resolution output.
- Social media: Meeting platform specifications to avoid cropping or quality loss.
Understanding these measurements helps avoid costly mistakes and ensures a consistent, professional user experience across all platforms.
---
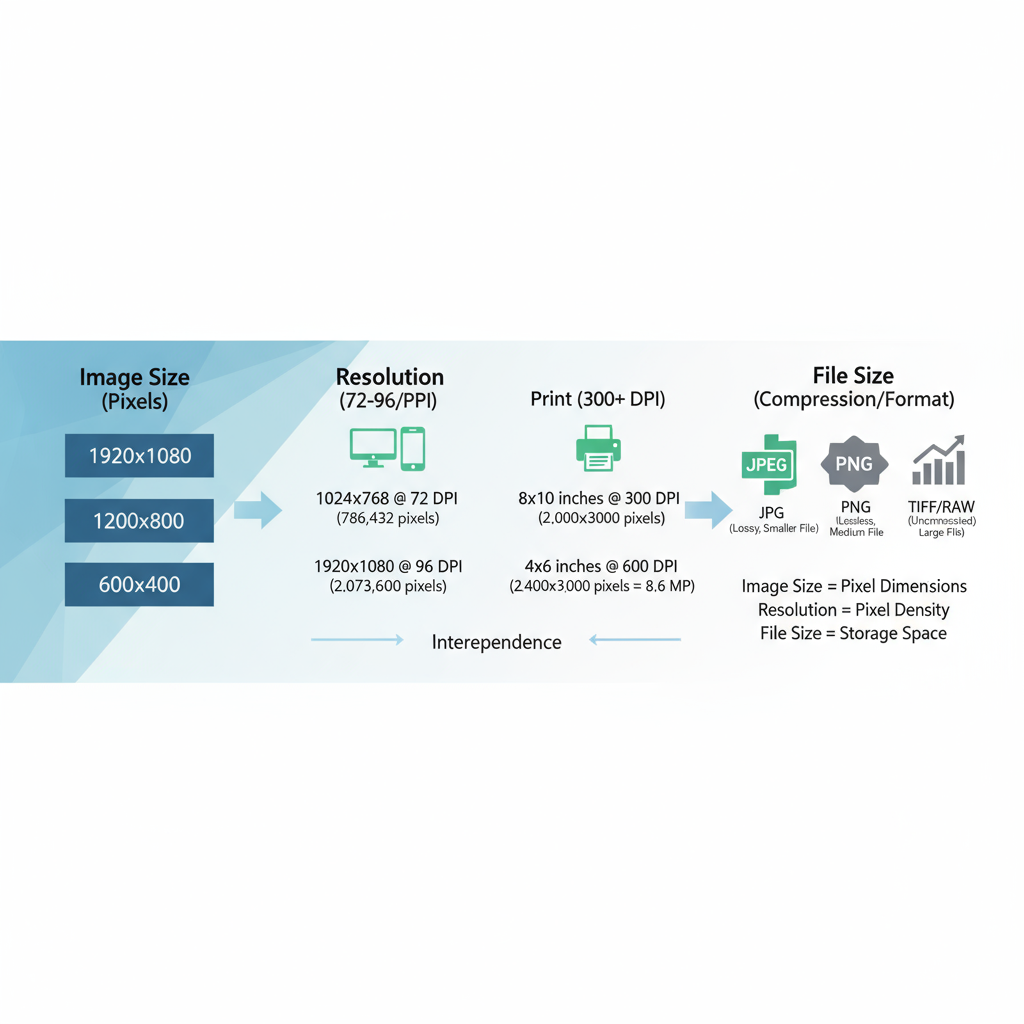
Image Size vs. File Size vs. Resolution
Many confuse image size, file size, and resolution — but they are distinct:
- Image size (dimensions): Width × height in pixels. Example: 1920×1080 px.
- File size: Storage weight in KB or MB, affecting speed and bandwidth. Example: 1.2 MB.
- Resolution: DPI (dots per inch) or PPI (pixels per inch); influences print quality and on-screen sharpness.
Clear understanding of these terms makes it easier to resize or compress images appropriately while maintaining quality.
---
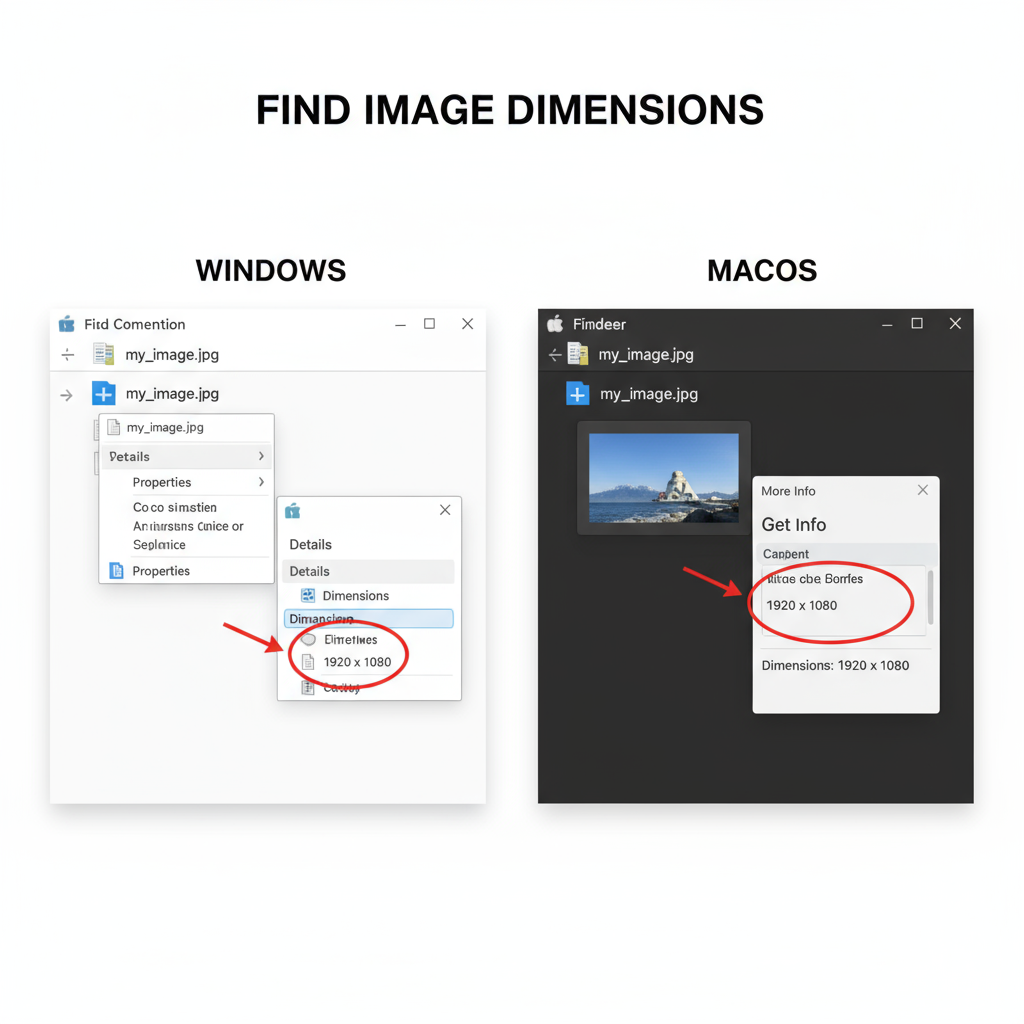
How to Check Image Dimensions on Windows
Verifying image size in Windows is simple:
- Using File Explorer:
- Right-click the file.
- Select Properties.
- In the Details tab, find Dimensions (e.g., 1280×720).
- Photos App:
- Open the image in Photos.
- Click the three-dot menu → File info.
- Note the width and height.
Pro tip: To quickly check many images, enable the Dimensions column in File Explorer’s Details view.
---
How to Check Image Dimensions on Mac
On macOS, checking pixel dimensions is just as quick:
- Finder:
- Right-click the file → Get Info.
- Under More Info, look for “Dimensions.”
- Preview App:
- Open the image.
- Select Tools → Show Inspector (⌘+I).
- In the “Info” window, choose General Info for pixel measurements.
Quick view (spacebar) reveals basics, but the inspector shows resolution and color details for more precise evaluation.
---
Using Online Tools to Find Your Image Size
Online services let you upload a file and instantly see size and resolution:
- ImageMagick Identify (browser-based)
- PineTools – size check and resize options
- Fotor – editing plus size info
- Pixlr – full editor with measurement data
Benefits:
- No software installation needed
- Cross-platform accessibility
- Often includes compression, format conversion, and editing utilities
---
How DPI and PPI Affect Final Image Quality
DPI and PPI determine level of detail per inch:
- DPI: In print, how many ink dots per inch are placed by the printer.
- PPI: On screens, pixels per inch; affects sharpness.
For web graphics, 72 PPI is usually fine.
For professional print, target 300 DPI for true-to-size reproductions.
Example: An image at 3000×2000 px printed at 10×6 inches at 300 DPI retains quality without resizing.
---
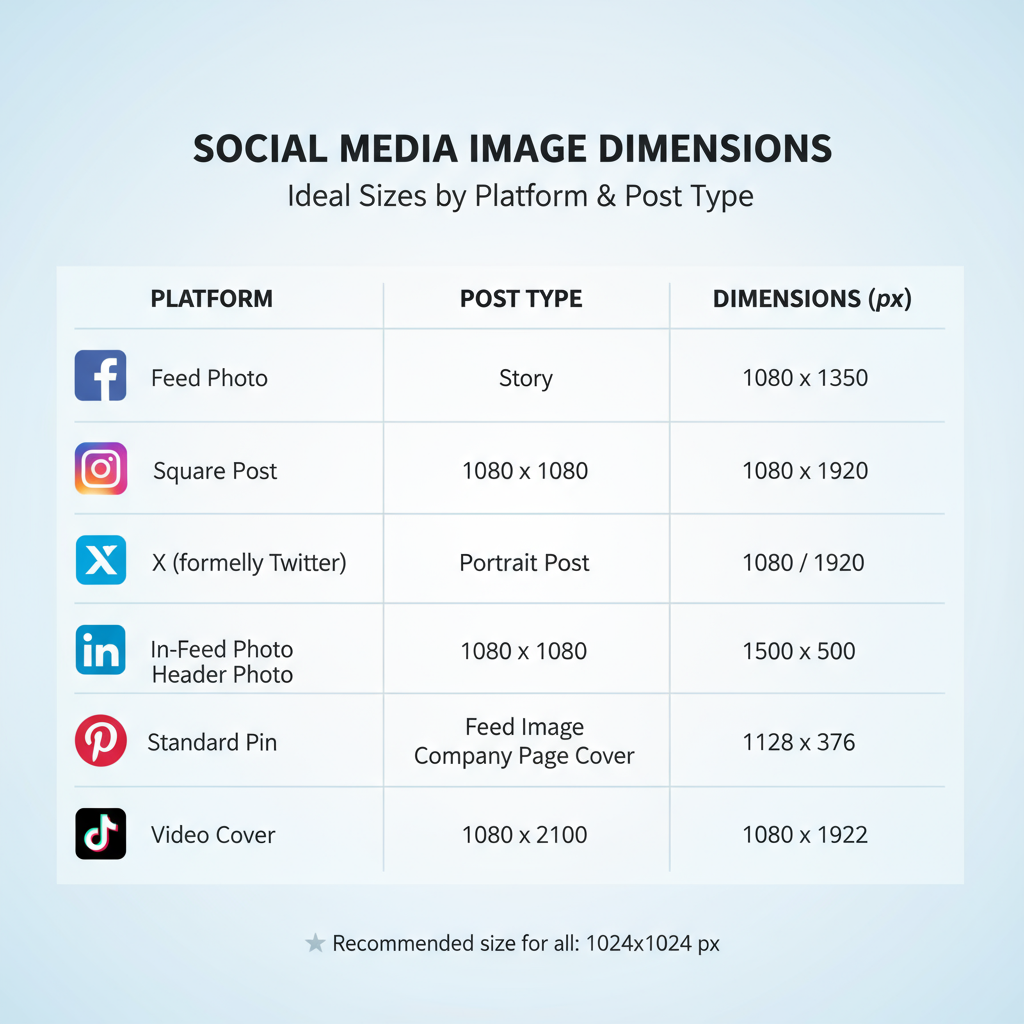
Ideal Image Sizes for Social Media Platforms
Use these 2024-recommended dimensions to ensure proper display:
| Platform | Profile Image | Cover/Header | Post Image |
|---|---|---|---|
| 180×180 px | 820×312 px | 1200×630 px | |
| 320×320 px | N/A | 1080×1080 px | |
| Twitter/X | 400×400 px | 1500×500 px | 1200×675 px |
| 400×400 px | 1584×396 px | 1200×627 px | |
| 165×165 px | N/A | 1000×1500 px |
Following these specs helps maintain branding consistency and visual clarity.
---
Best Practices for Resizing Without Losing Quality
To keep images crisp after resizing:
- Start with high-resolution originals.
- Maintain aspect ratio to avoid distortion.
- Select the right interpolation — e.g., “bicubic sharper” in Photoshop when downsizing.
- Avoid repeated JPEG saves to prevent lossy degradation.
Photoshop example:
Image → Image Size → Disable “Resample” → Adjust print dimensions---
Optimizing Image Size for Website Speed and SEO
Optimized images improve load speed — a Google ranking factor:
Tips:
- Compress with TinyPNG, Squoosh, or ImageOptim.
- Use modern formats like WebP or AVIF.
- Implement responsive images with `srcset`.
- Enable lazy loading so images load on scroll.
Example HTML snippet:
---
Common Mistakes When Resizing or Compressing Images
Watch out for these pitfalls:
- Aspect ratio errors – cause stretching.
- Excessive compression – yields visible artifacts.
- Upscaling low-res files – results in blurry graphics.
- Neglecting retina displays – leads to soft visuals on high-DPI screens.
- Incorrect format choice – avoid PNG for photos; use JPEG/WebP for efficiency.
Checking settings before exporting saves time and prevents quality loss.
---
Conclusion: Quick Takeaways and Tools to Bookmark
Key points:
- Know your image dimensions before uploading or printing.
- Differentiate between size, file weight, and resolution.
- Adhere to platform-specific social media sizes.
- Optimize images for site speed to enhance SEO.
- Avoid common mistakes that ruin quality.
Go-to tools:
- Desktop: Photoshop, GIMP, Affinity Photo
- Online: TinyPNG, Squoosh, Fotor
- Command-line: ImageMagick
Keep these in your workflow so you can always answer “what size is my image?” and deliver stunning, fast-loading visuals. Ready to put these tips into action? Start by checking and optimizing your images today for better results online and in print.