How to View Scheduled Posts on LinkedIn for Profiles and Pag
Learn how to view scheduled posts on LinkedIn for both personal profiles and company pages, with step-by-step guidance for admins and users.

Introduction to LinkedIn Post Scheduling
Learning where to see scheduled posts on LinkedIn is essential for making the most of the platform’s built-in scheduling capability. Scheduling posts on LinkedIn has become a key workflow for professionals, marketers, and brands striving to maintain a consistent presence and strategic communication cadence. With audiences active across multiple time zones and the growing need for planned outreach, the ability to schedule posts ensures your content reaches the right people at the right time — without requiring you to be online in the moment.
Whether you’re managing a personal profile to build thought leadership or operating a corporate page to engage customers, effective scheduling streamlines your LinkedIn marketing strategy and keeps your content calendar running on time.
---
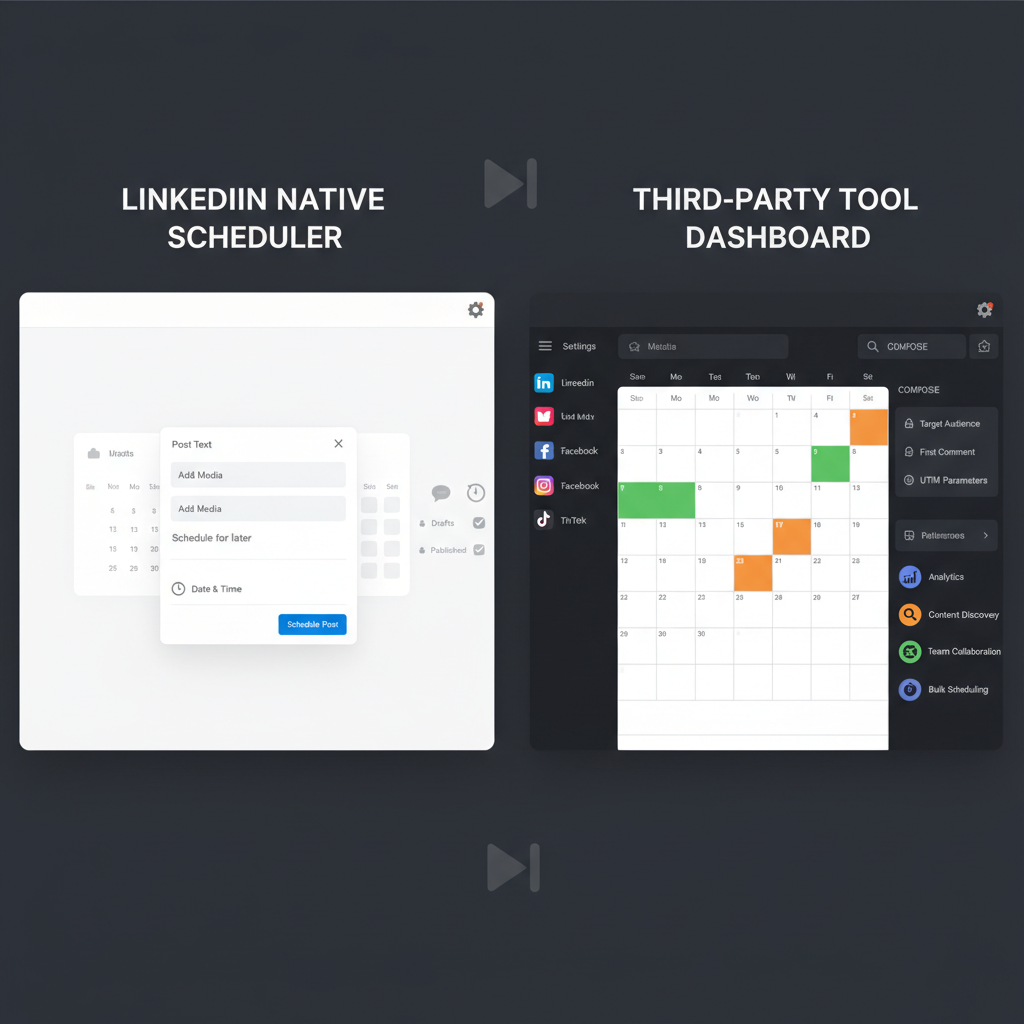
Native Scheduling vs. Third-Party Tools
LinkedIn’s native scheduling feature, rolled out in recent updates, allows users to queue posts directly from the platform. This has created an easier pathway for individuals and companies that prefer not to depend solely on external software.
Here’s how the two options compare:
| Feature | LinkedIn Native Scheduling | Third-Party Scheduler |
|---|---|---|
| Cost | Free, included with LinkedIn | Often subscription-based |
| Integration | Seamless with LinkedIn interface | Integrates with multiple platforms |
| Analytics | Basic native insights | More robust reporting options |
| Functionality | Schedule text, images, and some rich media | Additional features like bulk scheduling |
| Limitations | Only schedules to LinkedIn | Multi-platform posting |
---
Prerequisites for Scheduling and Viewing Posts
Before you begin scheduling and checking your content, be sure that:
- Profile or Page Access: You have an active LinkedIn account.
- Role Requirements for Pages: Company Pages require admin access with content creation permissions.
- Updated Platform: Use the latest version of LinkedIn’s web interface or mobile app.
- Stable Internet Connection: A reliable connection prevents scheduling errors.
---
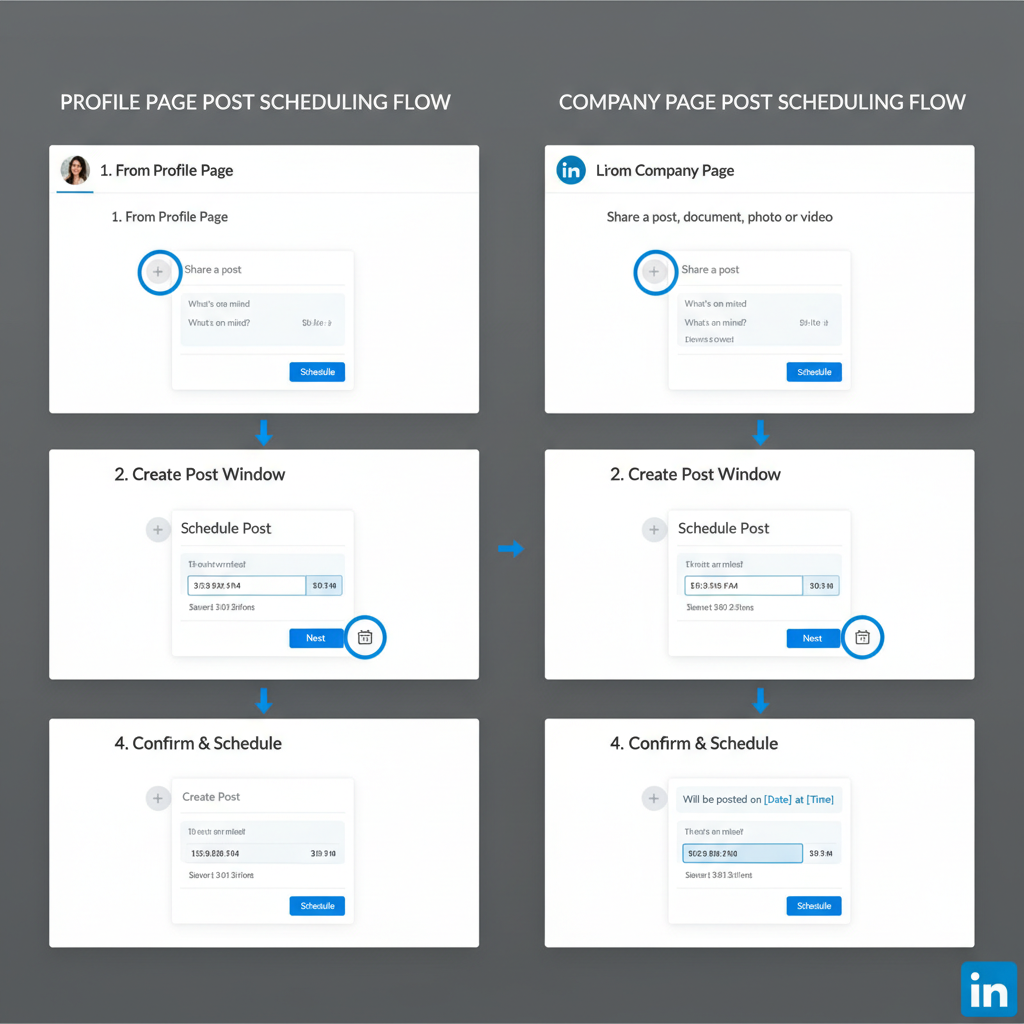
Step-by-Step: Scheduling a Post Natively on LinkedIn
Follow these steps to schedule a post directly in LinkedIn:
- Log in to LinkedIn on desktop or mobile.
- Click Start a post on your feed or company page.
- Compose your message, add images, documents, or videos.
- Click the Clock/Schedule icon (beside the Post button).
- Select your desired date and time from the scheduler pop-up.
- Confirm by clicking Schedule.
Pro tip: Most users can schedule content up to 90 days in advance.
---
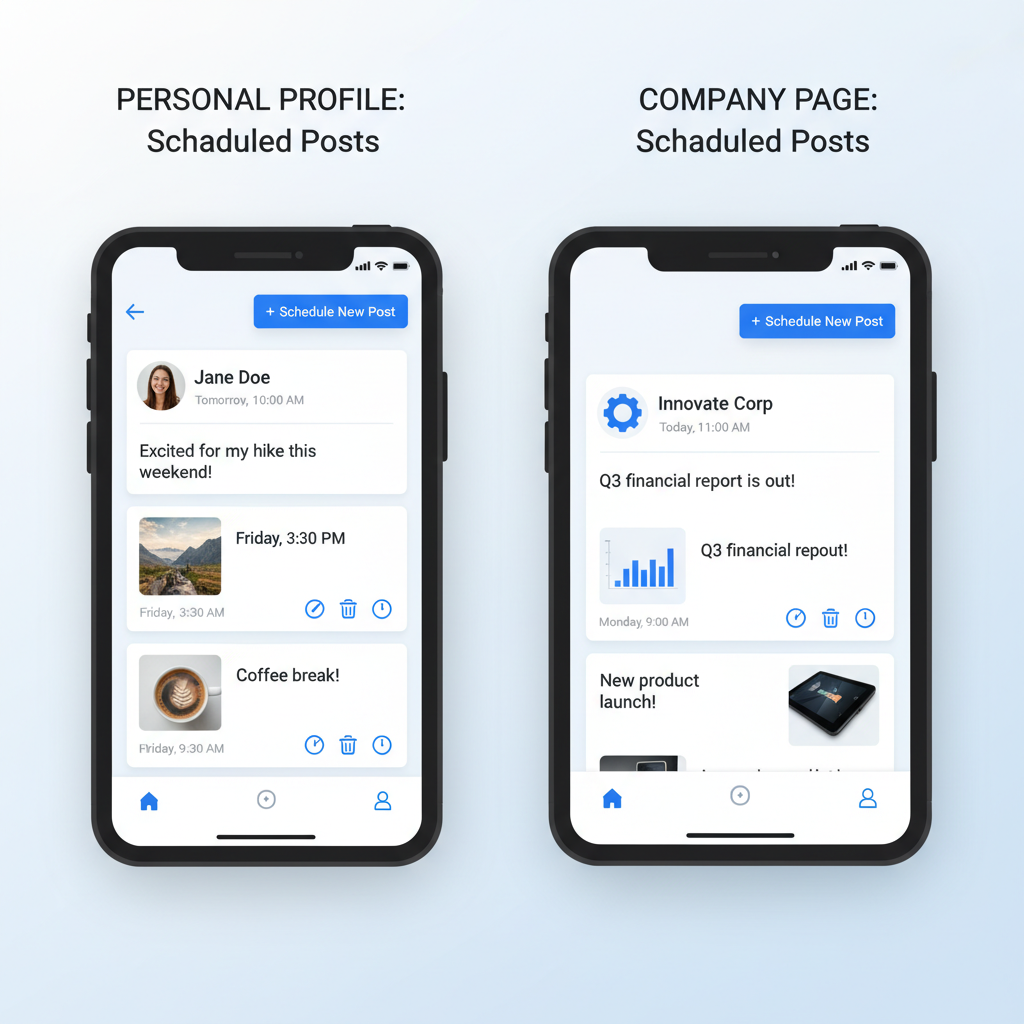
How to View Scheduled Posts on LinkedIn
Knowing exactly where to see scheduled posts on LinkedIn depends on whether you’re viewing them for a personal profile or a company page.
Viewing Scheduled Posts for Personal Profiles
- Log in to your LinkedIn Profile.
- Click Start a post or enter the post creation window.
- Click the Clock/Schedule icon again to access your scheduled list.
- Review upcoming posts with their respective dates and times.
If posts are not visible directly:
- Visit your Activity section and filter for scheduled posts. (This is being gradually rolled out.)
---
Viewing Scheduled Posts for Company Pages (Admin View)
For Company Pages, to locate scheduled posts:
- Navigate to your Company Page as an admin.
- Select Manage Page from the top menu.
- Go to the Content or Posts tab and click Scheduled.
- You’ll see a complete list of upcoming posts.
Multiple admins can view the same schedule, which is vital for collaborative content planning.
---
Editing, Deleting, or Rescheduling Scheduled Posts
Adjustments are sometimes necessary before a post goes live:
- Edit: Open the scheduled item, modify the copy or media, and save.
- Delete: Use the trash/delete icon to remove it from the queue.
- Reschedule: Change the scheduled time or date and confirm.
Note: Schedule changes aren’t announced to followers — the post simply publishes at the new time.
---
Troubleshooting: When Scheduled Posts Don’t Appear
If you can’t find your scheduled posts:
- Permission Issues: Ensure you’re an admin or authorized content creator.
- Browser Cache Problems: Clear cache or use a private/incognito window.
- App Version: Update the LinkedIn app if using mobile.
- Feature Rollout: Some scheduling features appear in stages by region.
Tip: The desktop version’s scheduling panel is generally the most reliable.
---
Tips for Organizing and Tracking Scheduled Content
To keep your content flow organized:
- Maintain a separate content calendar in tools like Google Sheets or Trello.
- Use tags or categories to label campaigns.
- Schedule posts based on audience engagement times from LinkedIn analytics.
- Keep a backup file of post copy/media.
This reduces duplication and keeps your team aligned on content in the queue.
---
Best Practices for Optimizing Scheduled Posts
Scheduling is only one piece of the strategy; optimization counts too.
1. Optimal Timing
- Post during high-engagement windows (B2B peaks mid-week mornings).
- Review analytics for your audience’s activity patterns.
2. Drive Engagement
- Add clear CTAs to encourage likes, shares, and comments.
- Ask open-ended questions that prompt discussion.
3. Improve Visual Appeal
- Include original images or short videos.
- Maintain cohesive brand visuals.
4. Continual Testing
- Track results of scheduled posts monthly.
- Experiment with different headlines, formats, and times.
---
Conclusion & Quick Checklist
Scheduling posts on LinkedIn — and knowing where to see scheduled posts on LinkedIn — helps you maintain a professional, consistent presence and manage campaigns more efficiently. LinkedIn’s native feature provides straightforward scheduling, while third-party tools deliver scalability for multi-channel strategies.
Quick Checklist:
- Confirm permissions for profile/page posting.
- Prepare content and use the Clock/Schedule icon.
- Access your scheduled posts list (personal or page admin view).
- Edit, reschedule, or delete as needed.
- Troubleshoot if visibility is an issue.
- Review analytics to refine future scheduling.
By mastering these skills, you can maximize reach, save time, and keep your LinkedIn presence consistently engaging. Start scheduling strategically today to make every post count!


