YouTube Short Dimensions: The Complete 9:16 Guide to Resolution, Safe Areas, and Export Settings
Master YouTube Shorts: exact 9:16 dimensions, 1080x1920 resolution, safe areas, fps/bitrate/codec tips, and export settings. Repurpose horizontal clips cleanly.
YouTube Short Dimensions: The Complete 9:16 Guide to Resolution, Safe Areas, and Export Settings

If you’re serious about Shorts performance, getting the canvas right is half the battle. This guide covers the exact YouTube Short dimensions, why 9:16 matters, safe zones, export settings, and how to repurpose horizontal footage without wrecking your framing. Keep this as your quick reference before every export.
Exact specs at a glance
| Attribute | Best practice / Notes |
|---|---|
| Aspect ratio | 9:16 (vertical) |
| Recommended resolution | 1080 × 1920 px (Full HD vertical) |
| Acceptable resolution | 720 × 1280 px |
| Optional high-res | 2160 × 3840 px (4K vertical) |
| Duration | Up to 60 seconds |
| Containers | MP4 or MOV |
| Video codecs | H.264 (AVC) or HEVC (H.265) |
| Scan type | Progressive (no interlacing) |
| Pixel aspect | Square pixels (PAR 1.0) |
| Frame rate | 24 / 25 / 30 / 60 fps (use 30 or 60 for motion-heavy content) |
| Color | Rec.709 for predictable results |
| Recommended bitrate (1080p) | 8–16 Mbps (VBR, 2-pass) |
| Recommended bitrate (4K) | 20–40 Mbps (VBR, 2-pass) |
| Audio | AAC, 320 kbps, 48 kHz |
> Tip: The algorithm looks for vertical video and length ≤ 60 seconds. If the width exceeds the height or you exceed 60s, you’re unlikely to be treated as a Short.
Why 9:16 matters
- Detection: YouTube typically classifies Shorts when the video is vertical (9:16) and 60 seconds or less. Sticking to the canonical youtube short dimensions helps ensure proper placement in the Shorts shelf.
- Screen real estate: 9:16 fills the phone screen. Uploading 1:1 or 4:5 can still appear, but you lose valuable pixels to margins and UI overlays.
- Letterboxing: Non-vertical clips may be letterboxed or pillarboxed. Black bars signal a low-effort upload and can reduce engagement.
- Prioritization: Even if non-9:16 videos appear in the feed, they tend to feel smaller and less immersive, often underperforming compared to true vertical.
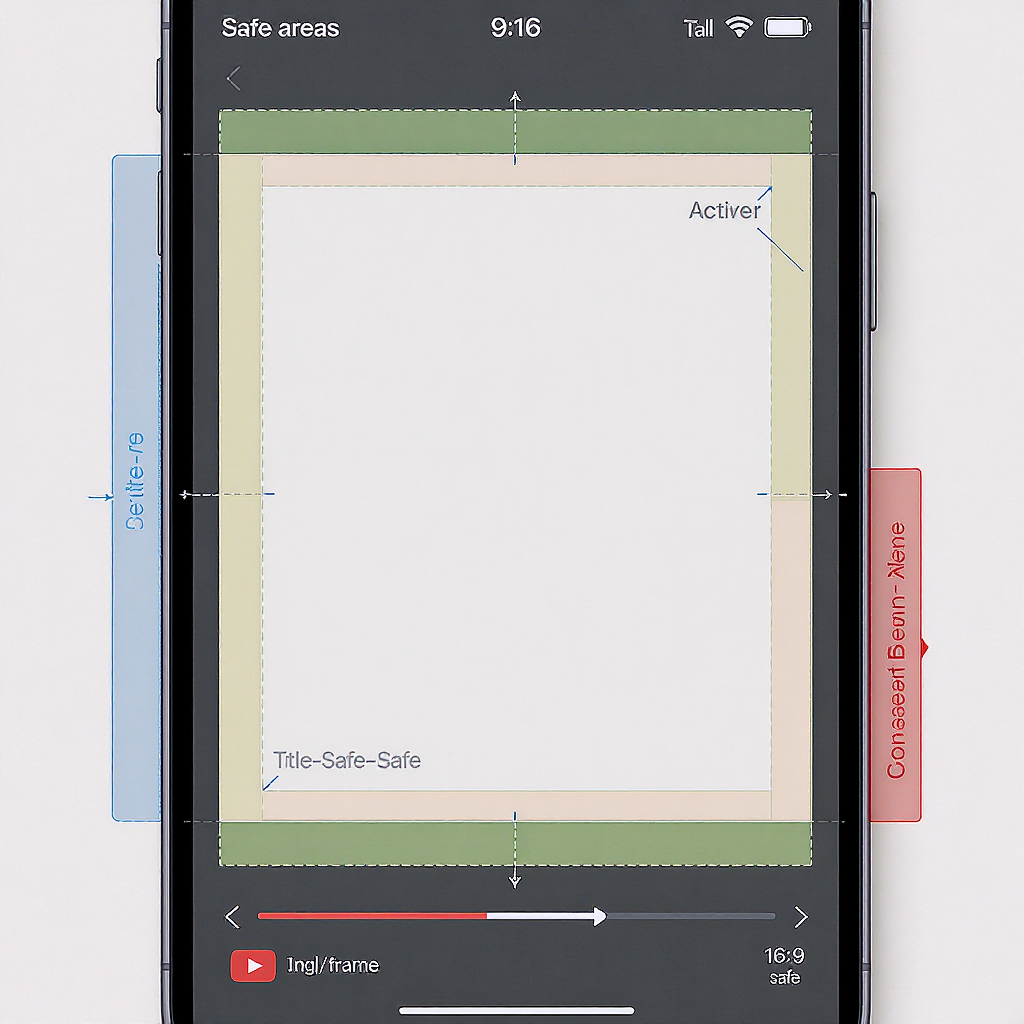
Safe areas and on-screen UI
YouTube overlays titles, channel info, subscribe, and controls on top of your video. Avoid critical text, captions, and logos near the edges.
- General rule: Keep key elements within the central 80–90% of the frame.
- For 1080 × 1920:
- 90% safe area: leave ~5% margins (≈54 px left/right, ≈96 px top/bottom).
- 80% safe area: leave ~10% margins (≈108 px left/right, ≈192 px top/bottom).
- UI awareness:
- Top: Title and channel UI can sit in the upper area.
- Bottom: Seek bar and audio/title overlays can encroach into lower pixels.
- Right side: Engagement buttons (like, comment, share) occupy vertical space; avoid placing tiny text there.
- Font sizing for small screens:
- Aim for a minimum of ~48–60 px text height on a 1080 × 1920 canvas for captions.
- Use bold, high-contrast typefaces. Avoid thin ultralight fonts.
- Accessibility tips:
- Maintain strong contrast between text and background; consider a shadow, stroke, or semi-opaque panel behind captions.
- Keep line lengths short (4–8 words per line).
- Burned-in captions increase comprehension in mute autoplay contexts.

Frame rate, codec, and bitrate
- Frame rate:
- 30 fps for most content; 60 fps for sports, gaming, or fast motion.
- Keep frame rate constant throughout; avoid variable frame rate (VFR) to prevent audio sync issues.
- Codec:
- H.264 is the safest bet; choose High Profile for quality.
- HEVC can yield smaller files at similar quality, but watch compatibility and upload processing times.
- Bitrate:
- 1080p vertical: Target 8–16 Mbps (VBR, 2-pass). Set a reasonable max (e.g., 16–20 Mbps).
- 4K vertical: Target 20–40 Mbps (VBR, 2-pass).
- Audio:
- AAC LC, 320 kbps, 48 kHz, stereo or mono depending on content.
- Color management:
- Work and export in Rec.709. HDR uploads can get tone-mapped unpredictably in the Shorts feed.
Export presets made simple
Set your sequence/timeline to 1080 × 1920 (9:16) at 30 or 60 fps. Use progressive scan, square pixels, and maximum render quality.
- Adobe Premiere Pro
- Sequence: 1080 × 1920, 30/60 fps, Rec.709.
- Export: H.264; Match Source; High Profile; Level Auto or 4.2 for 1080p60.
- Bitrate: VBR, 2-pass; Target 12–14 Mbps; Max 16–20 Mbps.
- Check: Render at Maximum Depth; Use Maximum Render Quality; Rec.709 color space.
- Final Cut Pro
- Project: Vertical 1080 × 1920 at 30/60 fps (Rec.709).
- Share: Computer > H.264 Better Quality (or HEVC Better Quality).
- Audio: 48 kHz, 320 kbps AAC.
- DaVinci Resolve
- Timeline: 1080 × 1920 Vertical (Project Settings > Image Scaling).
- Delivery: YouTube preset, then change Resolution to 1080 × 1920 and set H.264.
- Quality: Restrict to average 12–14 Mb/s; Key frames Auto; Encoding Profile High; RC VBR 2-pass if available.
- CapCut
- Resolution: 1080p; Frame rate: 30/60 fps; Codecs: H.264.
- Quality: Set to High; enable “HDR” off for consistent Rec.709.
- Export without watermarks for cross-posting.
CLI fans can use FFmpeg:
ffmpeg -i input.mov \
  -vf "scale=1080:1920:force_original_aspect_ratio=decrease,\
pad=1080:1920:(ow-iw)/2:(oh-ih)/2:black,fps=30" \
  -c:v libx264 -profile:v high -level 4.2 -pix_fmt yuv420p \
  -preset slow -x264-params "keyint=60:min-keyint=60:scenecut=0" \
  -b:v 12M -maxrate 16M -bufsize 24M -g 60 \
  -c:a aac -b:a 320k -ar 48000 -ac 2 \
  -movflags +faststart output_short.mp4
Notes
- Use scale with force_original_aspect_ratio=decrease to avoid distortion.
- Avoid black padding if possible; instead, crop/reframe to fill 9:16. If you must pad, consider a tasteful blurred background rather than pure black.
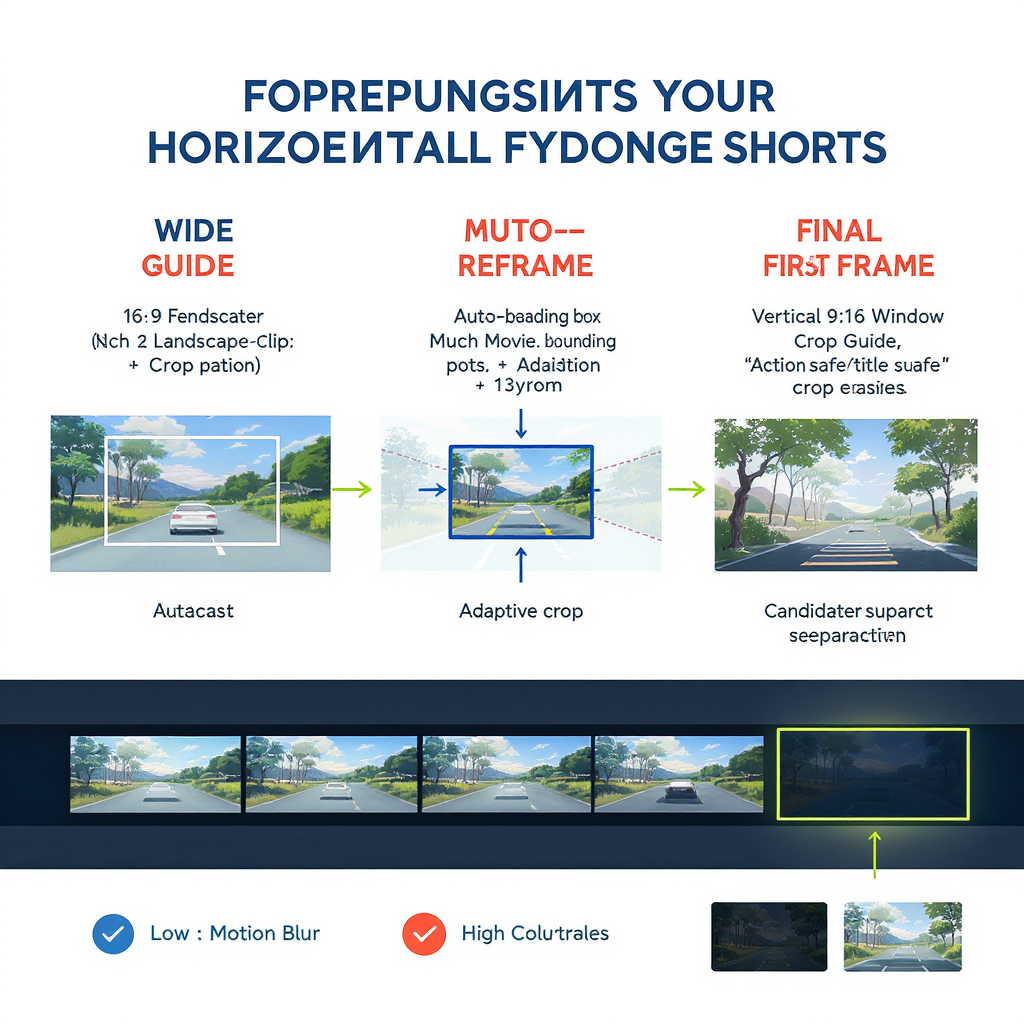
Repurposing horizontal footage
- Auto reframe:
- Premiere Pro: Auto Reframe Sequence will track subjects and recompose to 9:16.
- Final Cut Pro: Smart Conform re-centers key action for vertical.
- DaVinci Resolve: Smart Reframe (Cut page) or tracking in the Edit page to keep faces centered.
- CapCut: Auto Reframe and subject tracking tools can follow motion.
- Safe crop vs blur:
- Prefer a safe crop that preserves the subject. Use background blur only when you’d otherwise lose essential context.
- Split-screen vertical stacks:
- For interviews or podcasts, stack two 16:9 frames vertically inside 9:16. Add labels and clean dividers within safe areas.
- Reposition graphics:
- Move lower-thirds and logos out of UI zones; scale up for readability.
- Object tracking:
- Use face/object tracking to keep the point of interest centered throughout quick cuts.
Thumbnails and first-frame strategy
- Hook instantly:
- The Shorts feed often uses the first frame viewers see in motion; make the first 1–2 seconds visually compelling and legible.
- Custom thumbnails:
- Where your channel/Studio allows, set or upload a custom thumbnail to improve clicks from Search and channel grids. Keep it clean, bold, and legible on small screens.
- Design tips:
- Bold faces, big expressions.
- 3–5 words max.
- Strong contrast, minimal clutter.
Cross-posting to TikTok and Reels
- Same 9:16, different overlays:
- TikTok and Reels place captions and buttons in slightly different positions. Keep essential text centrally aligned and within the central 80–90% to be safe across platforms.
- Remove watermarks:
- Export a clean master. Avoid reuploading videos stamped with another platform’s logo.
- Native captions:
- Re-caption inside each app for better discoverability and access to platform-specific features (auto-captions, stickers).
- Audio:
- Consider platform-native music selection for better reach, but keep a version with original audio ready.
Common pitfalls and a final QA checklist
Common pitfalls
- Letterboxing or pillarboxing (black bars) from wrong aspect ratio.
- Mixed orientations in one sequence (clips rotated or with metadata issues).
- Variable frame rate causing sync drift after upload.
- Over-compression leading to banding in gradients and skies.
- Tiny captions unreadable on 5–6 inch screens.
- Clipped or overly quiet audio; inconsistent loudness between clips.
- HDR or wide-gamut exports causing unexpected shifts in the feed.
Final QA checklist
- Aspect ratio is 9:16, resolution 1080 × 1920 (or 4K vertical if you prefer).
- Duration ≤ 60 seconds.
- Progressive, square pixels; constant frame rate (30 or 60 fps).
- Codec H.264/HEVC, Rec.709 color; no unintended HDR flags.
- Bitrate VBR 2-pass: 8–16 Mbps (1080p) or 20–40 Mbps (4K).
- Audio AAC 320 kbps, 48 kHz; no clipping; consistent loudness.
- All text/logos inside central 80–90%; no overlap with UI zones.
- First 1–2 seconds are visually strong; optional custom thumbnail ready.
- No watermarks; clean master saved for cross-posting.
- Visual pass on a real phone screen to check sharpness, readability, and color.
Master the core youtube short dimensions—9:16, clean safe zones, and solid encoding—and your content will not only look professional, it’ll also have a better chance of winning attention in the vertical scroll.
Summary
For the best Shorts performance, stick to a true 9:16 aspect ratio, keep your runtime at or under 60 seconds, and respect safe areas so text and subjects aren’t covered by UI. Export in H.264 or HEVC at sensible bitrates (8–16 Mbps for 1080p), use Rec.709 color, and verify everything on a real phone. When repurposing horizontal footage, auto-reframe, crop intelligently, and avoid letterboxing to maintain an immersive, professional look.