How Do I Put a Story on Instagram Step-by-Step Guide
Learn step-by-step how to create Instagram Stories, use interactive tools, tag users, and adjust privacy to boost engagement and reach.
How Do I Put a Story on Instagram: Step-by-Step Guide
Instagram Stories are one of the most popular features for sharing moments, engaging followers, and increasing your visibility on the platform. If you’ve ever wondered how to put a story on Instagram, this complete, SEO-friendly guide will walk you through everything — from opening the camera to posting, adding interactive elements, and tracking results. By following these steps, you’ll be able to create Stories that capture attention and boost engagement.
---
Understanding Instagram Stories and Their Popularity
Instagram Stories are temporary posts that disappear after 24 hours and appear at the top of your followers’ feeds. You can share photos, videos, text, and interactive stickers.
Benefits of using Stories include:
- Sharing spontaneous updates without affecting your main grid.
- Increasing engagement through polls, quizzes, and Q&A.
- Giving behind-the-scenes glimpses of your life or brand.
- Building stronger connections with your audience.
They are fast, fun, and authentic, with an ephemeral format that encourages casual posting while driving interaction through built-in tools.

---
Update Your Instagram App First
Before creating any content, make sure your Instagram app is up to date so you can access the latest Story features like new stickers, effects, and layouts.
How to update:
- iOS: Open the App Store → Tap your profile icon → Scroll to Instagram → Tap Update.
- Android: Open Google Play Store → Tap Menu → My apps & games → Locate Instagram → Tap Update.
If you skip this step, some newer creative tools might not be available.
---
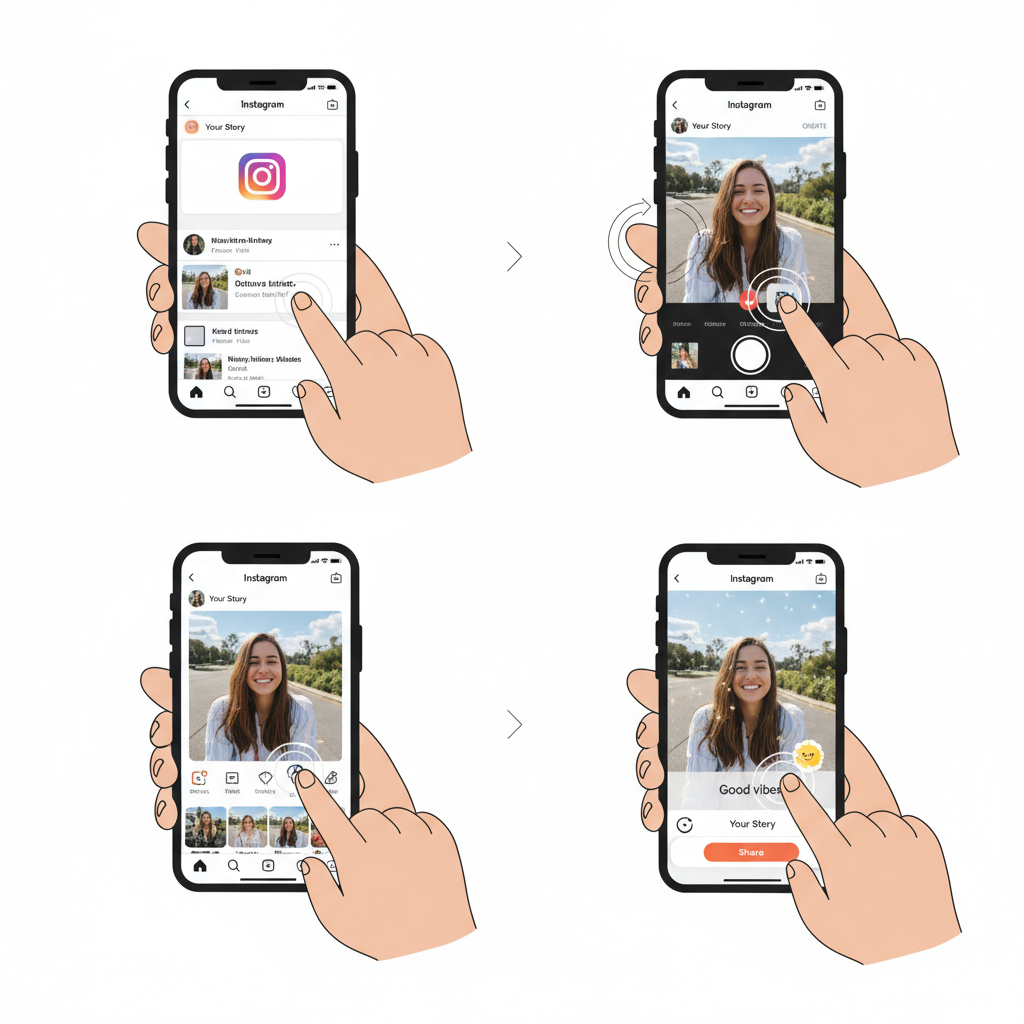
Accessing the Story Creation Screen
You can start your Story in several quick ways:
- Swipe right from anywhere in your main feed.
- Tap the camera icon in the top-left corner of the home screen.
- Long-press your profile picture in the Stories bar.
Each method leads you to the Story camera interface.
---
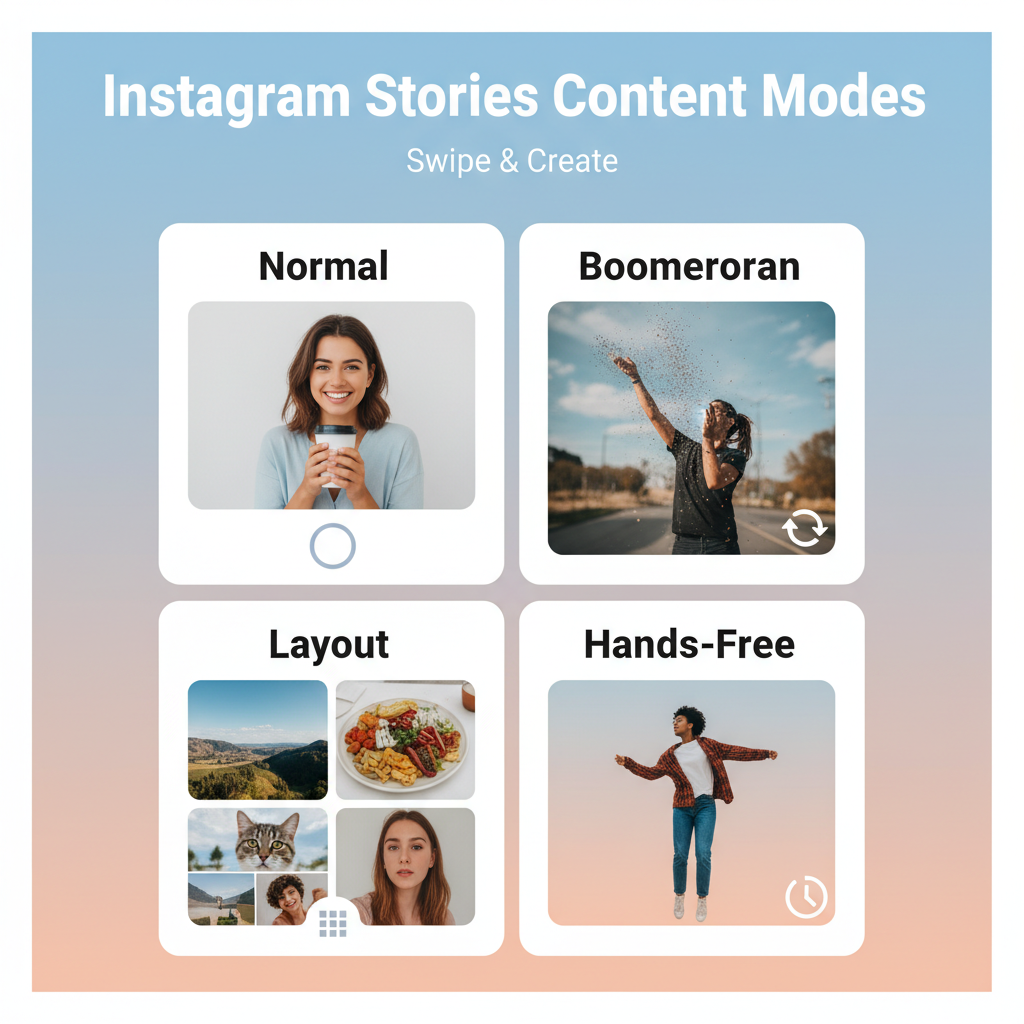
Select Your Preferred Content Mode
At the bottom of the Story camera, you can choose from:
- Normal – Capture a standard photo or video.
- Boomerang – Create a short looped clip.
- Layout – Combine multiple photos into one frame.
- Text – Share a written message.
- Hands-Free – Record without holding the record button.
- Dual – Use front and back cameras together (if supported).
Swipe sideways across the menu to switch modes.
---
Capture or Upload Your Media
You have two main options:
- Tap the shutter button for a photo.
- Hold it to record video.
- To upload existing media, swipe up or tap the gallery icon (bottom-left).
Tips:
- Make sure the app has photo/video permissions enabled.
- Use the 9:16 vertical aspect ratio for best results.
---
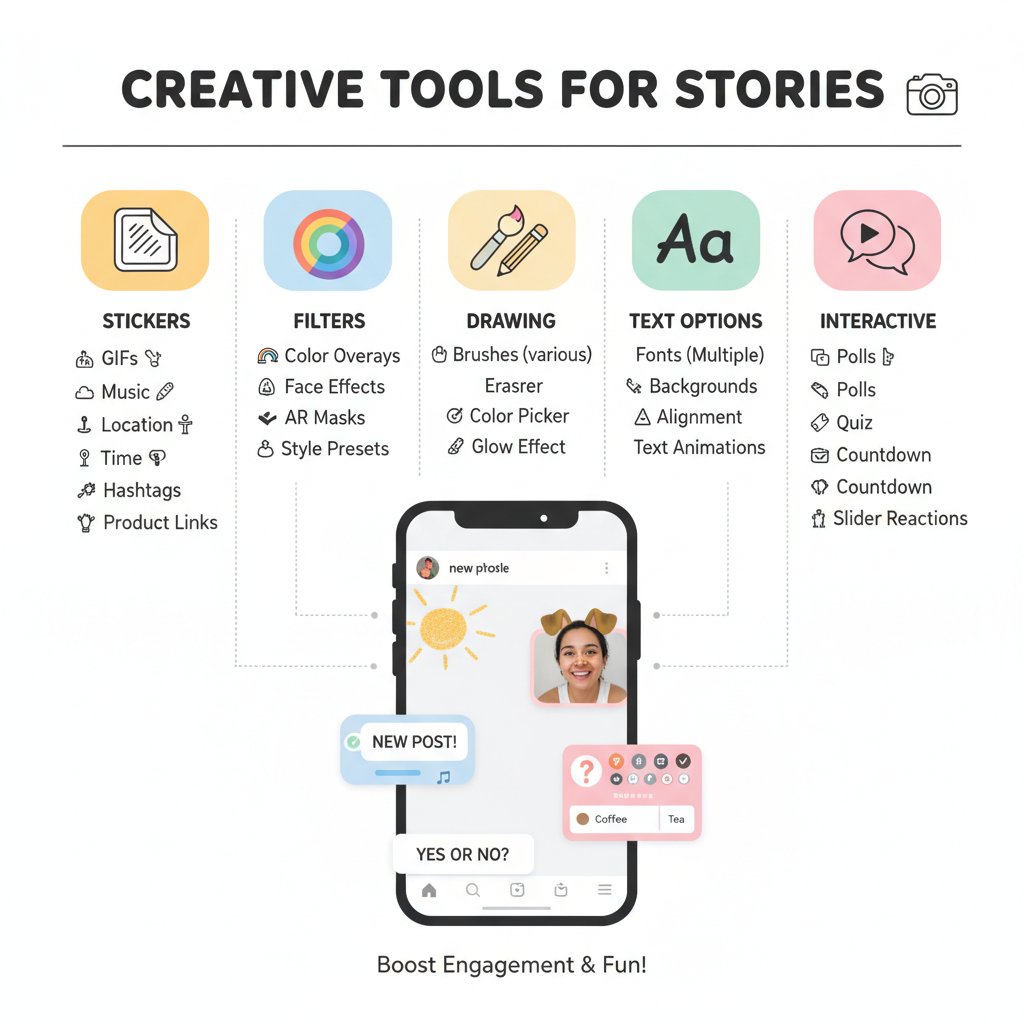
Use Creative Tools to Boost Engagement
The top of the screen shows tools for making your Story more interesting:
- Stickers like location tags, mentions, polls, quizzes, questions.
- GIFs from the Giphy library.
- Polls and Questions for immediate interaction.
- Countdowns for events.
- Music overlays from a searchable library.
An example: Add a poll asking “Which design do you prefer?” to encourage quick taps.
---
Enhance with Filters, Drawing, and Text
Enhance visuals before posting:
- Swipe left/right for color filters.
- AR Effects are available from the effects carousel.
- Drawing tools let you doodle with pens or markers.
- Text options include different fonts, colors, and alignments.
These details make your Story more recognizable.
---
Tag People and Add Hashtags
Improve discoverability by:
- Mentioning other users (@username) so they receive alerts.
- Using hashtags (#YourTopic) to appear in hashtag collections.
Drag, pinch, and rotate these elements to position them. Keep your design clean to avoid clutter.
---
Adjust Story Privacy Settings
Before hitting publish, choose who can see your Story:
- Close Friends List for a private audience.
- Hide Story From specific followers.
Manage these in Settings → Privacy → Story.
---
Share or Send Your Story
When your Story is ready:
- Tap Your Story to post for all followers.
- Tap Close Friends for a restricted audience.
- Use Send To for direct messages.
---
Check Your Story’s Performance
After posting:
- Swipe up on your Story to see who’s viewed it.
- Business and creator profiles can access Insights for reach, impressions, and interactions.
If certain formats perform better, repeat those styles.
---
Save or Highlight Your Best Stories
Because Stories vanish in 24 hours unless saved:
- Save to your device or archive.
- Add to Highlights for permanent display on your profile.
Highlights act as curated story collections.
---
Avoid These Common Mistakes
| Mistake | Why It’s a Problem |
|---|---|
| Too cluttered visuals | Overwhelms viewers and dilutes your message |
| Ignoring aspect ratio | Results in cropped or distorted images/videos |
| Overusing stickers/GIFs | Makes Stories appear unprofessional |
| No audio optimization | Music/voiceovers may be too loud or too quiet |
---
Pro Tips for Higher Engagement
- Post regularly during peak activity times.
- Integrate interactive stickers to increase taps.
- Tell mini story arcs with a beginning, middle, and end.
- Mix formats: photos, short clips, boomerangs.
- Use easy-to-read text.
- Share behind-the-scenes moments.
---
Conclusion and Next Steps
Mastering how to put a story on Instagram will help you connect authentically with your audience, whether you’re sharing personal life or building a brand presence. By using the creative tools available, respecting design best practices, and tracking performance, you can turn ephemeral posts into meaningful relationships.
Now it’s your turn — open Instagram, create your next Story, and start engaging like a pro. For more social media tips and tutorials, explore our other guides.