How to Upload a Video to Instagram Story on iOS and Android
Learn how to upload a video to Instagram Story on iOS and Android, with tips on formatting, editing, and boosting engagement with creative tools.
How to Upload a Video to Instagram Story on iOS and Android
Instagram Stories are one of the most dynamic ways to share content that disappears after 24 hours, perfect for personal moments, brand highlights, and audience engagement. If you’ve been wondering how to upload a video to Instagram Story on your iPhone or Android device, this step-by-step guide will walk you through everything—from preparing your clip to troubleshooting any hiccups—so your Stories are high-quality, engaging, and impactful.

---
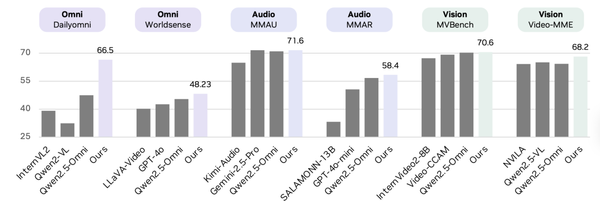
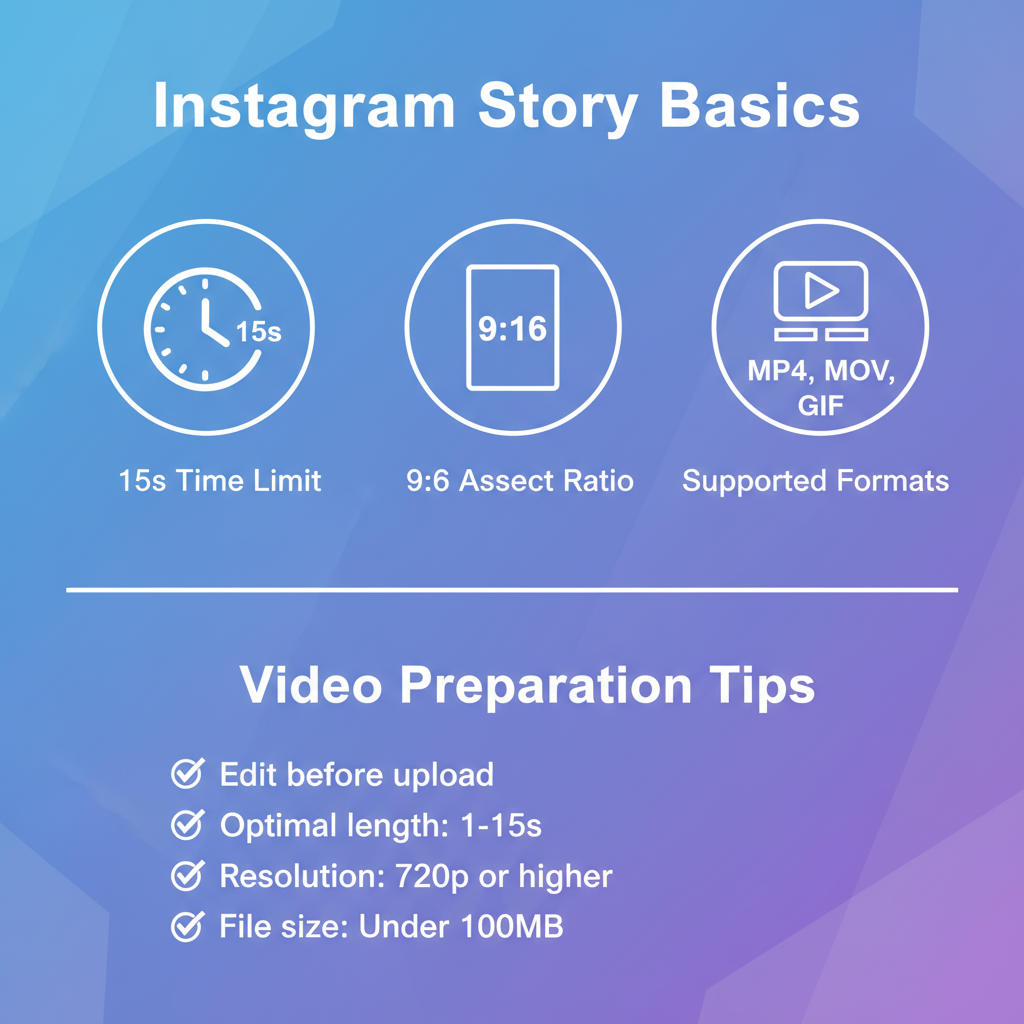
Understanding Instagram Story Basics
Before you post, it’s important to understand the platform’s technical requirements for videos:
- Maximum Duration: 15 seconds per clip (longer videos are automatically split).
- Supported Formats: MP4 and MOV are recommended.
- Aspect Ratio: 9:16 (vertical) is optimal; 1080×1920 resolution works best.
- File Size: Stay under 4GB for faster uploads.
- Orientation: Vertical format maximizes screen coverage.
Meeting these specs ensures your audience sees your video as intended, with minimal cropping or distortion.
---
Preparing Your Video for Upload
A polished video is more likely to get noticed:
- Trim Unnecessary Footage: Only keep the most relevant moments.
- Orient to Vertical: Adjust rotation for optimal visual presentation.
- Enhance Visuals: Edit brightness, contrast, and colors for appeal.
- Use Editing Apps: Tools like InShot, CapCut, or Adobe Premiere Rush offer templates tailored for Instagram Stories.
---
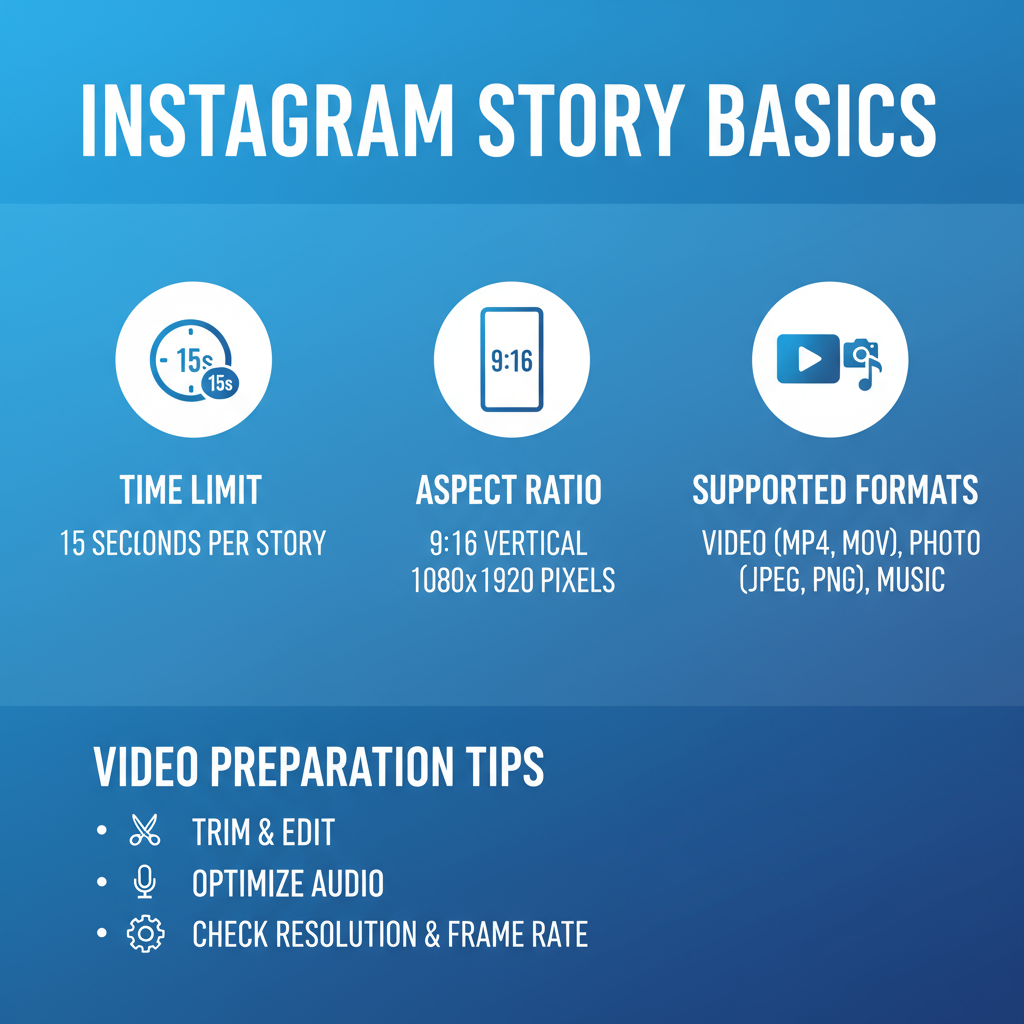
Access the Instagram Story Camera
Uploading always begins in the in-app Story Camera:
- Launch the Instagram app on iOS or Android.
- Tap your profile picture at the upper-left of your home feed, or swipe right from the feed.
- You’ll enter the Story Camera where you can record or upload.
---
Record In-App vs. Upload from Gallery
Two main content sources are available:
- Record In-App: Press and hold the circular shutter to capture fresh footage.
- Upload from Gallery: Swipe up or tap the gallery icon (bottom-left) to select a saved video.
Choose the method depending on whether you want spontaneous capture or a pre-edited clip.
---
Step-by-Step: Uploading from Gallery
The steps vary slightly by platform.
For iOS
- Swipe Up on the Story Camera.
- Select your desired video from Camera Roll.
- Resize or reposition using pinch and drag gestures.
- Tap Next or proceed directly to editing.
For Android
- Swipe Up or tap the gallery preview icon.
- Select your desired video from the Gallery or Google Photos.
- Adjust zoom/cropping if necessary.
- Proceed to Story editing automatically.
---
Add Text, Stickers, and Interactive Elements
Personalization helps your Story stand out:
- Text Tool (Aa): Add captions, highlight key points, or invite action.
- Stickers: Include emojis, GIFs, polls, and quizzes.
- Draw Tool: Make hand-drawn annotations.
Using polls, quizzes, and question boxes can significantly boost viewer engagement.
---
Apply Filters, Effects, and Music
Enhance style and mood:
- Filters: Swipe across the screen for preset looks.
- AR Effects: Access augmented reality overlays.
- Music: Tap the music note icon to add licensed songs—select specific time segments for the best sync.
Creative effects can turn a standard clip into a compelling Story.
---
Tagging, Location Stickers, and Hashtags
Boost reach and relevance:
- @Mentions: Recognize collaborators or friends.
- Location Tags: Tap into regional audiences.
- Hashtags: Add up to three relevant, on-brand hashtags to attract non-followers.
These can help your Stories appear in discover feeds and searches.
---
Preview and Make Adjustments
Before finalizing:
- Watch your Story through once.
- Check layouts so text and stickers don’t obscure key visuals.
- Adjust sticker and text placement/timing by dragging along the playback bar.
Taking a moment to review prevents errors and enhances presentation.
---
Publish to Your Story or Close Friends
When ready:
- Your Story: Visible to all followers unless restricted.
- Close Friends List: Targets a private group for exclusive content.
Publishing this way allows tailored sharing strategies.
---
Save Stories to Highlights
Preserve Stories beyond 24 hours:
- View your posted Story.
- Tap Highlight at the bottom.
- Add to an existing Highlight or create a new themed collection.
Highlights serve as evergreen content on your profile.
---
Troubleshooting Common Upload Issues
Even with proper preparation, issues can happen:
| Issue | Possible Cause | Solution |
|---|---|---|
| Video Not Uploading | Poor internet connectivity | Switch to a reliable Wi-Fi or cellular network. |
| Quality Loss | Instagram compression | Use high-resolution vertical format and limit pre-upload re-encoding. |
| Audio Missing | Music licensing restrictions | Select music from Instagram’s in-app library. |
| Format Error | Unsupported codec | Convert to MP4 (H.264 video, AAC audio) before uploading. |
---
Tips to Boost Story Engagement
Make every upload count:
- Post When Followers Are Active: Use Insights to time posts.
- Grab Attention Early: Start with a striking frame or statement.
- Add Captions: Assist viewers who watch silently.
- Stay Consistent: Frequent posts keep engagement steady.
- Organize Highlights: Curate thematic collections for long-term value.
---
Summary and Next Steps
By mastering how to upload a video to Instagram Story on both iOS and Android, you can combine technical quality with creative flair for maximum impact. From understanding format requirements to adding interactivity and troubleshooting common issues, these steps will help your Stories upload smoothly and engage viewers effectively.
Start experimenting today—test different formats, effects, and posting times, and watch as your Instagram Stories become a powerful part of your social media strategy.